16 Genius DIY Home Decor Projects That Look Expensive
Creating a luxurious home does not always require designer furniture or an expensive renovation budget. Many high-end decorative looks can be recreated using basic materials, thoughtful styling, and a little patience. Simple upgrades such as adding molding, painting inexpensive furniture, or creating custom artwork can dramatically change how a room feels. The secret is choosing projects with clean finishes, balanced proportions, and materials that imitate the texture and character of premium interiors.
These DIY home decor projects are designed to look polished while remaining practical for everyday homeowners and renters. Each idea can be adjusted to suit modern, minimalist, traditional, or organic interior styles. Neutral colors and natural textures often create the most expensive-looking results, but bold finishes can also feel sophisticated when applied carefully. From statement mirrors to custom storage, these ideas will help you create Pinterest-worthy spaces without overspending.
1. Create a Fluted Console Table
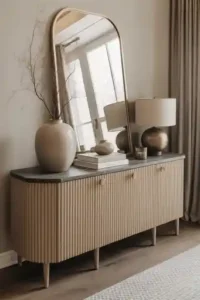
A basic cabinet or inexpensive console can be transformed into a designer-inspired piece by adding narrow wooden dowels or flexible pole wrap to the front. The repeated vertical lines create depth and make flat furniture appear architectural. Paint the entire unit in warm white, taupe, black, or muted green for a seamless finish. Adding a thicker wood or stone-look top will make the console feel more substantial and professionally constructed.
Measure the cabinet carefully before cutting the fluted material so every section aligns neatly. Use strong adhesive and secure each piece until completely dry. Replace basic handles with slim brass or matte black hardware, or use push-to-open fittings for a cleaner appearance. Style the finished console with one large mirror, a sculptural vase, and a small stack of books. Limited accessories will allow the texture and craftsmanship to remain the main focus.
2. Make Oversized Textured Wall Art

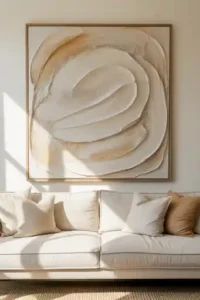
Oversized artwork can be expensive, but a large canvas and lightweight joint compound can create a convincing designer alternative. Spread the compound across the surface using a broad scraper, then form arches, waves, or organic lines before it dries. Once hardened, paint the entire piece in warm white, beige, clay, or soft gray. The raised texture catches light and gives the artwork a refined, gallery-like appearance.
Keep the design simple because large-scale textured art looks most sophisticated when it is not overly detailed. Create a slim frame using inexpensive wood trim stained in oak, walnut, or black. Hang the finished piece above a sofa, bed, or console where it can become a strong focal point. Pair it with minimal furniture and soft lighting so the subtle shadows remain visible and the room feels calm, balanced, and intentionally designed.
3. Upgrade a Mirror With a Sculptural Frame
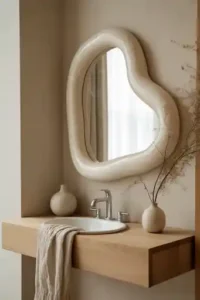
A plain mirror can be turned into a striking decorative feature by building a thick sculptural frame around it. Use lightweight foam board, flexible molding, or layered cardboard to create an arched, wavy, or irregular outline. Cover the structure with joint compound or air-dry clay, then sand it gently for a smooth finish. Paint the frame in ivory, sand, terracotta, or matte black to suit your interior palette.
Before beginning, protect the mirror surface carefully and make sure the new frame does not add excessive weight. Organic shapes look especially luxurious because they resemble handcrafted plaster or stone. Mount the finished mirror above a vanity, console, or fireplace and keep nearby accessories restrained. A small lamp, ceramic vessel, or branch arrangement is usually enough. The sculptural frame will make the mirror appear custom-made and far more expensive than its original cost.
4. Build a Faux Marble Side Table
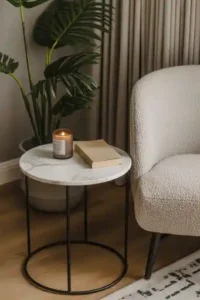
A simple side table can achieve a luxurious marble appearance using adhesive vinyl, printed laminate, or a carefully painted faux-stone finish. Start with a smooth tabletop and apply the chosen material without bubbles or visible seams. Soft gray veining on a white background creates a classic look, while beige stone patterns feel warmer and more organic. Pair the surface with a black, brass, or dark wood base for contrast.
Seal painted finishes with a durable clear coating so the tabletop remains practical for everyday use. Pay special attention to the edges because clean wrapping or careful painting makes the biggest difference between a homemade and professional result. Style the table with only one or two items, such as a candle, small book, or ceramic bowl. The restrained display will emphasize the elegant surface and help the piece resemble expensive designer furniture.
5. Install DIY Picture Frame Molding
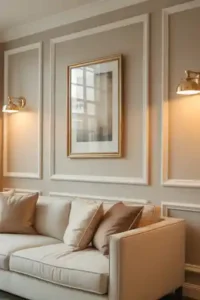
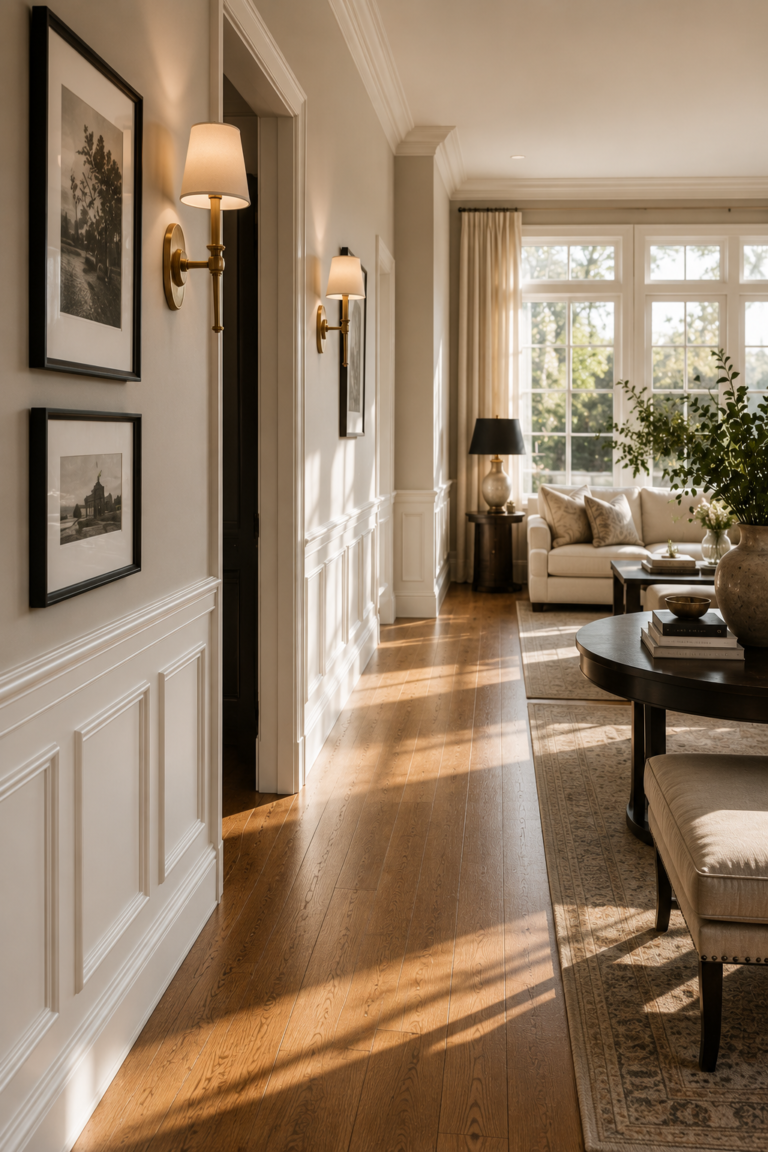
Picture frame molding can make a plain wall look architecturally detailed and significantly more expensive. Use lightweight trim to create large rectangular panels behind a sofa, bed, dining table, or hallway console. Careful measuring is essential so the spacing remains consistent across the wall. Painting the molding and background in the same color creates a subtle, modern effect, while contrasting trim produces a more traditional appearance.
Plan the layout with painter’s tape before cutting any material, allowing you to adjust the proportions visually. Fill every joint and nail hole, then sand before painting for a seamless finish. Large panels usually look more refined than many small boxes, especially in contemporary rooms. Add artwork or wall sconces within selected sections, but avoid filling every panel. The molding itself should provide enough detail to make the wall feel complete.
6. Transform Glass Vases With a Ceramic Finish
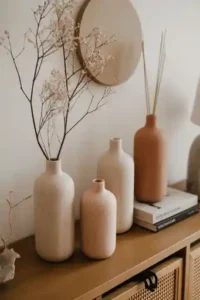
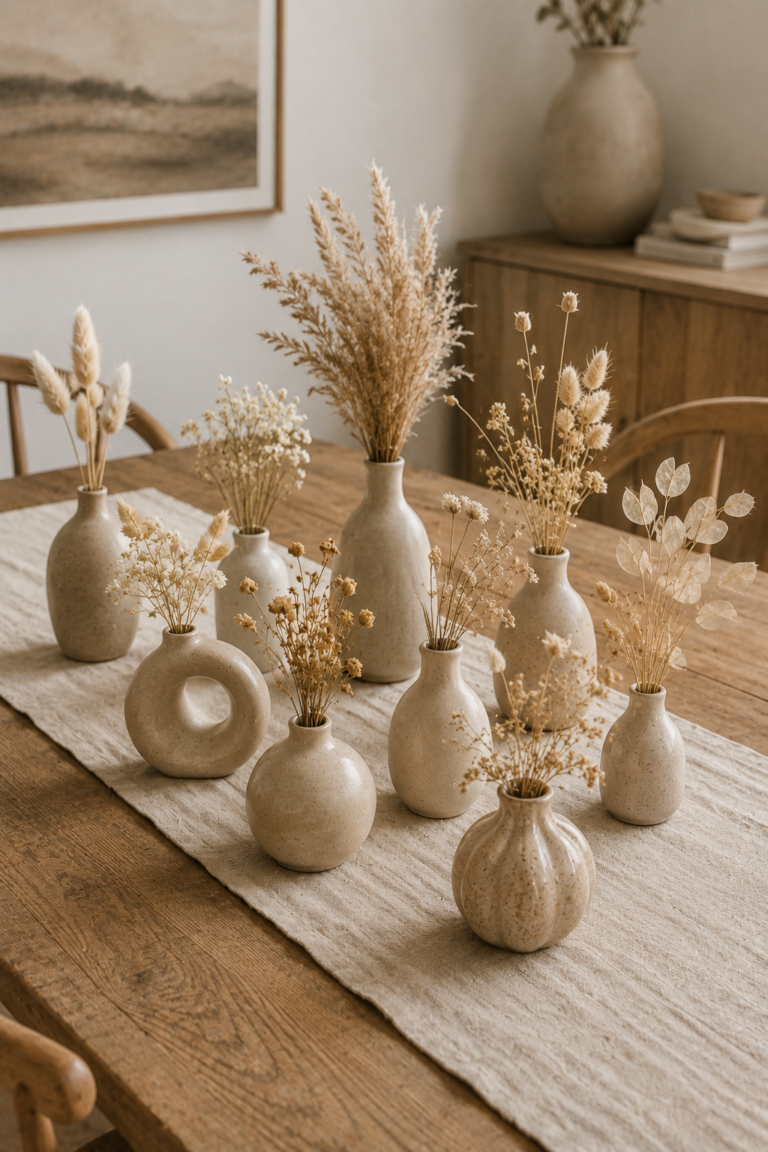
Old glass vases and bottles can be given the appearance of handmade pottery using paint mixed with baking soda or fine texture medium. Apply several thin coats with a brush or sponge to create a matte, slightly uneven surface. Warm beige, chalky white, black, clay, and muted olive work especially well. Mixing different vessel shapes will create a collected display that resembles expensive artisan ceramics.
Allow every coat to dry fully before adding another, and vary the brush direction to avoid an overly uniform finish. A darker base coat with a lighter dry-brushed layer can create realistic depth and aged character. Group the completed vases in odd numbers and fill only one with branches or dried stems. Leaving the others empty highlights their sculptural forms and keeps the arrangement looking sophisticated rather than crowded or overly decorative.
7. Create a Designer-Inspired Pleated Lamp
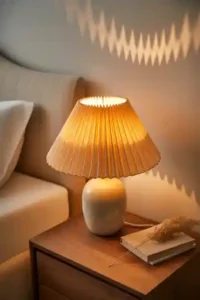
A basic lampshade can be upgraded with carefully folded fabric, wallpaper, or decorative paper to create a soft pleated effect. Linen-look fabric and neutral printed paper often provide the most refined appearance. Attach the folds evenly around the shade, keeping the top and bottom edges aligned. The added texture softens the light and gives an inexpensive lamp the character of a custom decorative fixture.
Choose heat-safe materials and use an appropriate low-temperature bulb to keep the finished lamp practical. A ceramic or wood-look base will complement the pleated shade and strengthen its designer appearance. Place the lamp on a nightstand, console, or side table where the folds can be viewed at eye level. Keep surrounding decor simple, using perhaps a small book and dish, so the sculptural shade remains the most noticeable element.
8. Make a Faux Built-In Bookcase
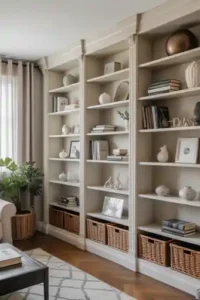
Several inexpensive shelving units can be joined together and finished with trim to resemble a custom wall-to-wall bookcase. Position the units closely, secure them safely, and cover visible gaps with narrow wood strips. Add baseboards, upper molding, and side panels to connect the shelves with the surrounding architecture. Painting everything in one color will unify the separate pieces and create a convincing built-in effect.
Style the shelves with a balanced combination of books, artwork, pottery, baskets, and personal objects. Avoid filling every space because negative space helps the display feel more luxurious. Place heavier items lower and smaller decorative pieces near eye level. Repeating colors and materials across different shelves will create visual consistency. With careful finishing and thoughtful styling, basic flat-pack furniture can resemble professionally installed custom cabinetry at a fraction of the cost.
9. Design a Linen-Look Pinboard
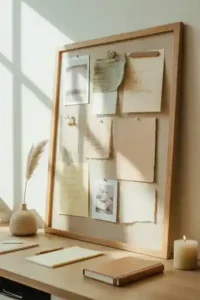
A large fabric-covered pinboard can make a home office, kitchen, or creative corner feel organized and beautifully styled. Cover corkboard or foam board with neutral linen, canvas, or textured upholstery fabric, pulling it tightly around the edges. Add a slim wooden frame stained in natural oak or walnut. The finished board will look more like a custom textile panel than a standard office supply.
Use matching pins and limit displayed papers to a coordinated selection of notes, photographs, artwork, and fabric samples. Leaving some visible linen around each item prevents the board from looking cluttered. Position it above a desk or console and repeat the frame’s wood tone through nearby accessories. This project combines practical organization with soft texture, giving the room a polished editorial quality that works beautifully in Pinterest-inspired interiors.
10. Build a Floating Bedside Shelf
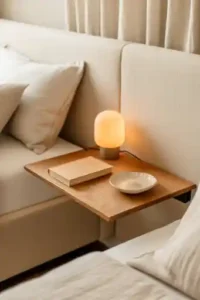
A floating bedside shelf offers a clean, space-saving alternative to a traditional nightstand. Use a solid wood board or create a hollow box shelf for a thicker, more substantial appearance. Rounded corners and a natural oak or walnut finish can make the piece look especially refined. Hidden brackets keep the installation visually simple and give the shelf the appearance of extending directly from the wall.
Make sure the shelf is secured into suitable wall supports and positioned at a comfortable height beside the mattress. Keep the surface styling minimal so it remains functional. A compact lamp, one book, and a small dish provide enough detail without creating clutter. Concealed cable clips can manage charging wires neatly. This simple project is especially effective in small bedrooms, where it preserves floor space while adding a customized architectural feature.
11. Create a Decorative Fireplace Screen
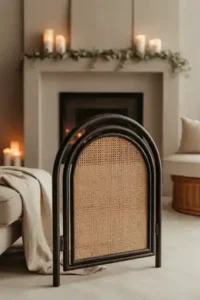
A decorative screen can make an unused or nonworking fireplace look intentional throughout the year. Build a lightweight frame from wood strips, then add woven cane, perforated metal, or decorative mesh to the center. An arched top creates a classic designer-inspired silhouette, while a simple rectangle suits minimalist interiors. Paint the frame matte black, warm white, or dark brown to coordinate with the fireplace surround.
This screen should only be used decoratively unless every material is specifically rated for fireplace heat and installed according to safety requirements. Style the surrounding mantel with a mirror, artwork, or several candlesticks, keeping the arrangement balanced. The woven or patterned center hides a dark empty opening and adds subtle texture. Even without major construction, the fireplace will appear more polished and connected to the room’s overall decorative scheme.
12. Make a Bouclé-Style Storage Bench
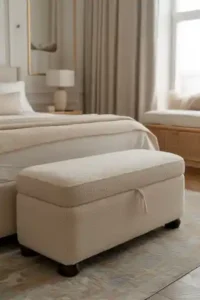
An inexpensive storage bench can be reupholstered with textured cream fabric to resemble high-end bouclé furniture. Add a thin layer of foam around the top and visible sides, then stretch the fabric smoothly and secure it underneath. Rounded corners create a softer designer-inspired appearance. The finished bench can provide seating, blanket storage, and visual interest at the foot of a bed or beneath a window.
Select durable upholstery fabric that can handle regular use and disguise minor imperfections. If the original bench has visible legs, paint or stain them in a finish that coordinates with nearby furniture. Style the top with one folded throw rather than several cushions, preserving enough space for seating. This project works best in calm neutral rooms, where texture becomes more important than strong color and helps the space feel layered and luxurious.
13. Paint a Faux Limewash Accent Wall
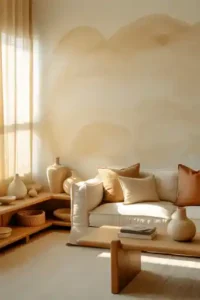
A faux limewash effect can give a plain painted wall the soft movement and depth of hand-applied plaster. Use two closely related shades of matte paint and apply them with a large brush in overlapping, irregular strokes. Warm beige, clay, gray, sage, and muted blush are particularly effective. The subtle variation creates a natural, aged surface that changes gently as daylight moves across the room.
Practice the technique on a sample board before beginning, because pressure and brush direction influence the final result. Work in manageable sections and avoid creating a repetitive pattern. Keep furniture and artwork simple so the wall’s texture remains visible. Natural wood, linen, stone, and ceramic accessories complement the effect beautifully. This affordable paint treatment can make a bedroom, dining room, or living space feel custom-finished and architecturally interesting.
14. Build a Cane-Front Cabinet
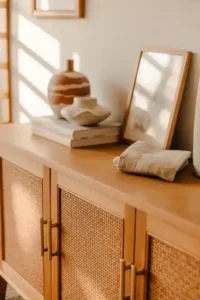
A plain cabinet can be transformed by replacing solid door centers with woven cane or attaching cane webbing over recessed panels. The natural material introduces warmth, texture, and a handcrafted quality associated with expensive custom furniture. Light oak creates an airy look, while black or walnut framing produces stronger contrast. Cane-front cabinets work beautifully as media units, entryway storage, bedside furniture, or dining room sideboards.
Soak cane webbing briefly if needed before attaching it, allowing the material to tighten as it dries. Secure the edges neatly inside the door frame so staples or adhesive remain hidden. Add simple knobs or slim handles in brass, black, or wood. Keep the cabinet top carefully styled with a lamp, framed artwork, and one decorative vessel. The woven detail will provide enough visual interest without requiring many additional accessories.
15. Create a Stone-Look Pedestal Table
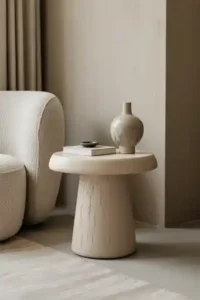
A pedestal side table can be created from stacked wooden circles, sturdy cardboard forms, or lightweight construction tubes covered with texture compound. Build a stable cylindrical base and attach a round top, then coat the entire piece in plaster-effect paint. Beige limestone, warm gray concrete, or chalky white finishes will create the appearance of carved stone without the weight or expense of natural material.
Sand any rough edges carefully and apply a protective matte sealer once the surface has dried. Slight texture and tonal variation will make the finish appear more realistic than perfectly smooth paint. Use the table beside a sofa, reading chair, or bathtub area, but avoid placing excessive weight on lightweight constructions. Style it with one sculptural object or small lamp. The simple silhouette will give the room a refined, gallery-inspired character.
16. Sew Extra-Long Linen-Look Curtains
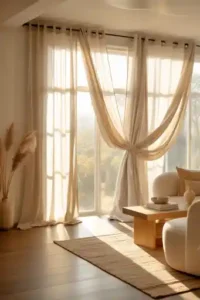
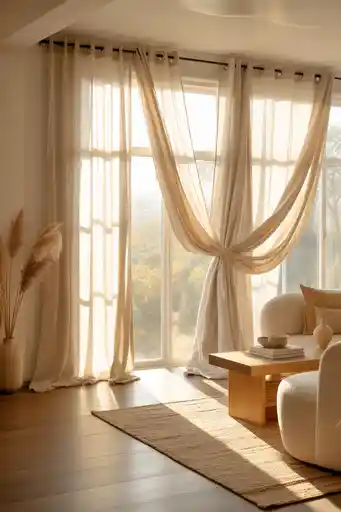
Curtains hung close to the ceiling can make windows appear taller and give a room a more luxurious sense of scale. Use affordable linen-look fabric, drop cloths, or ready-made panels that can be lengthened with a concealed lower section. Choose warm white, oatmeal, taupe, or soft gray for a timeless appearance. Wide panels create fuller folds and make the fabric look more substantial when the curtains are closed.
Mount the rod several inches beyond each side of the window so the panels can rest mostly against the wall when open. This allows more daylight to enter and makes the window appear wider. Use curtain rings or hidden tabs to create neat, even folds. The fabric should lightly touch the floor or form a very small break. Correct length and generous fullness will make inexpensive curtains resemble custom window treatments.